
My new‑to‑me “Asus ProArt-Branded” X‑Rite i1 Display Pro colorimeter arrived in the post yesterday, so I figured I’d write a bit about the installation and calibration process. £100 felt like a lot of money to drop on such a tiny, second hand gadget, but it’s such a critical part of any photographer’s workflow that it couldn’t be avoided – especially after the recent passing of my Spyder 5 from Datacolor.
Before I could even think about calibration, however, I had to assemble the modern equivalent of the old X‑Rite workflow. Most colour‑critical professionals use Calibrite Profiler or the older X‑Rite i1Profiler, because they’re the officially supported, vendor‑validated tools. But Calibrite, who now own the X‑Rite hardware line, no longer provide the legacy i1Profiler utilities unless you pay an upgrade fee (around £60) for their new ecosystem. The software didn’t come with the device, and it’s no longer downloadable.
Instead, DisplayCAL has become the de‑facto tool for enthusiasts and anyone who wants more control than the vendor software allows. It’s paired with ArgyllCMS, which sits underneath it as the engine that actually drives the measurements. Installing both is straightforward: DisplayCAL provides the interface, ArgyllCMS provides the muscle.
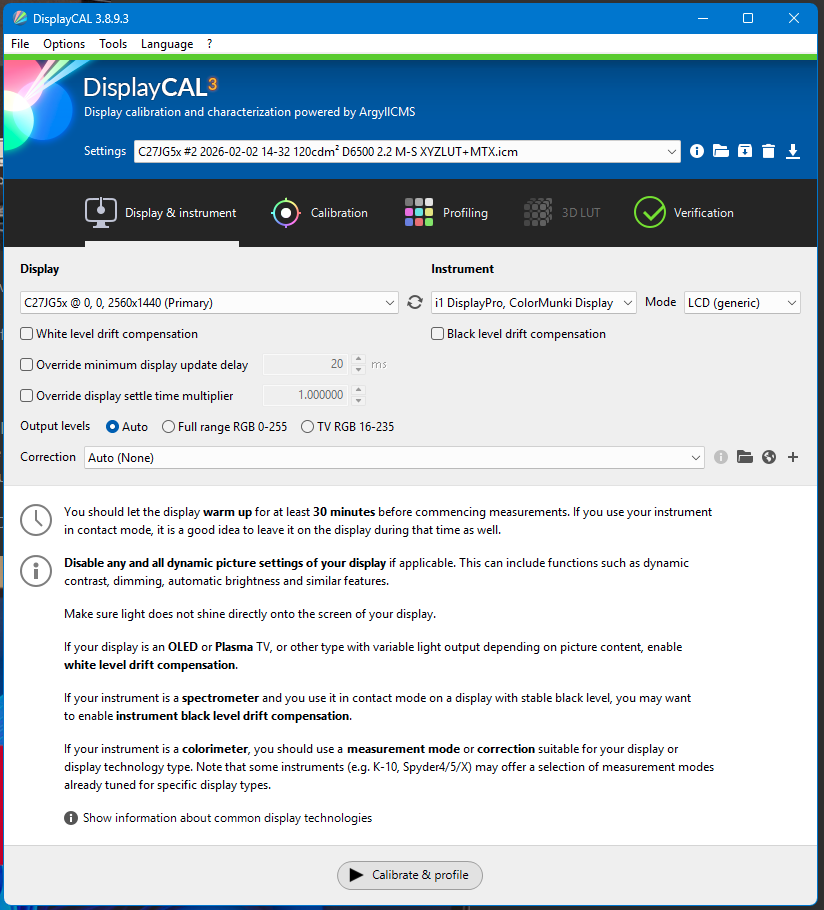
At this stage, everything looked okay. DisplayCAL recognised the device immediately, listed it in the instrument dropdown, and felt ready to begin. I connected my i1Display Pro, hung it over the monitor using the counterweight strap and hit “Calibrate & Profile”.
I expected the usual sequence: the ArgyllCMS measurement window, the familiar colour swatches, the slow march through the calibration routine, but that’s not what happened. The device was visible, but the calibration was throwing an error – and that’s when I started to doubt my decision to buy a second‑hand instrument.
DisplayCAL could see the i1Display Pro, but ArgyllCMS couldn’t actually use it. The moment I tried to start a calibration, the process collapsed with the vague error:
new_disprd() failed with "Instrument Access Failed"
No measurement window, no swatches, no activity – just a refusal to begin. DisplayCAL was handing the device off to ArgyllCMS, and ArgyllCMS was immediately bouncing it back.
“Instrument Access Failed!?!?!?”…
Panicking that I’d bought an expensive paperweight, I dug into Device Manager to see if this device had fallen off its perch in the same way as my Spyder. Thankfully, the hardware ID correctly identified it as USB ID 0765:5020 – indicating at least a superficially functioning colorimeter. The real cause only became clear once I checked the driver settings: Windows 11 had paired the i1Display Pro with a generic HID driver. DisplayCAL could enumerate the device at a high level, but ArgyllCMS saw it as nothing more than a “dumb keyboard”.
The fix was to replace the Windows driver with libusb‑win32 using the driver‑swapping tool Zadig. Once I selected the device (it appeared as i1 Display 3, USB ID 0765:5020) and swapped the driver, everything fell into place. After reconnecting the device, DisplayCAL launched the ArgyllCMS measurement window without hesitation, the swatches appeared, and the calibration finally began.
The sensor cycled effortlessly through the greyscale ramps, then the primaries, then the long sequence of colour patches. After the profiling pass, DisplayCAL generated the ICC profile and installed it cleanly into Windows’ colour‑management system
After installing the profile, I expected that familiar “ah, there it is” moment – the instant snap to a clean, neutral image. Instead, what threw me was how wrong the calibrated display looked. Everything had a faint green bias, especially in the “grey” UI around Outlook and Excel. It wasn’t subtle; it was the kind of thing you notice immediately and then can’t un‑see.
I’d spent years assuming calibration was a magic wand: you run the sensor, you get a perfect screen, job done. So when DisplayCAL finished and the result looked dim, flat, and off‑neutral, my first instinct was that something had gone wrong in the profiling process. My second instinct was the opposite – that the calibration was correct, and it was my eyes that were wrong. Maybe I’d lived with a warm cast for so long that true neutrality felt alien. After all, the computer said “Yes,” so surely the problem was me.
But after a few days of living with it, the feeling didn’t go away. It wasn’t growing on me. It wasn’t settling. It wasn’t “my eyes adjusting.” It was just… wrong, more than a little unsettling. I’d trusted the process, and the process had given me something that felt worse than the showroom mode I’d been using for years.
After a couple of days of trying to live with the profile, I decided the only sensible thing to do was to recalibrate from scratch. Maybe I’d made a mistake. Maybe the profile hadn’t installed cleanly. Maybe the room lighting had shifted. Whatever the cause, the first step in any fresh calibration is always the same: check the monitor’s RGB gains. So I opened DisplayCAL’s adjustment window again, expecting to make a few tiny tweaks… and that’s when things started to get interesting.
The issue wasn’t that the factory settings were wildly non‑neutral – in fact, 50/50/50 was pretty close – visually at least. The real problem was my assumption that “50” represented the midpoint of each channel’s usable range, and that I could simply nudge red, green, or blue up or down from there, between zero and ninety-nine, to achieve perfection. As it turned out, that wasn’t how this panel behaved at all.
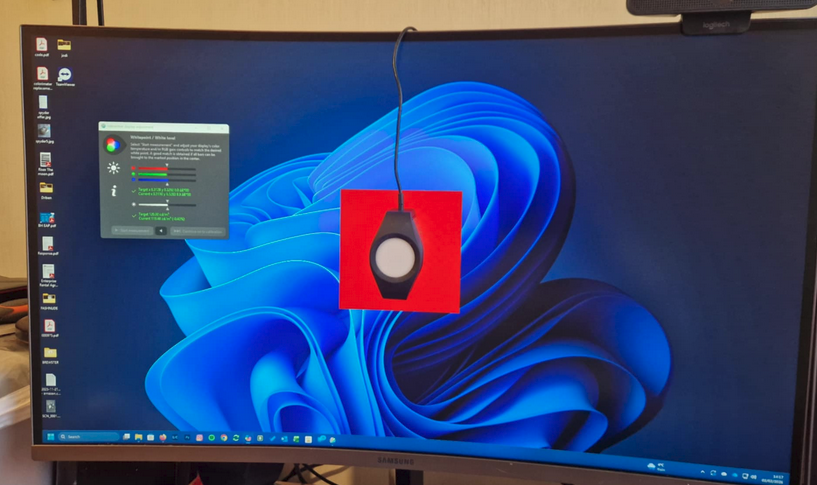
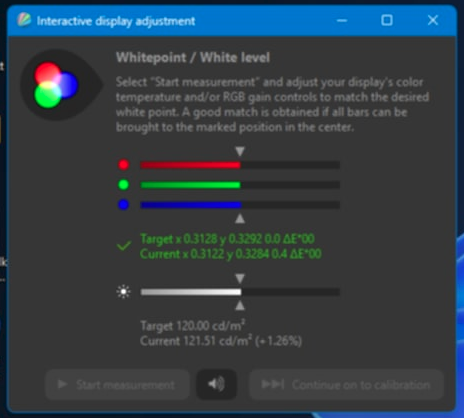
During calibration, DisplayCAL opened the RGB adjustment window. The sliders displayed their previously calibrated values of 48/56/48, confirmed by a measured neutral whitepoint in the UI – but my screen still looked odd – heavily weighted toward green. Something didn’t add up.

Backing off the green to reduce the visual cast, initially, there was no difference in the measured whitepoint. 56, 55, 54, 53… no change. Surely my i1 hasn’t packed up already, with a faulty green channel measurement? Eventually, as i reduced further through 50, 49, 48, 47, the whitepoint started to change. Pushing the green slider back up – 55, 60, 70, 80, even 100 – made no measurable difference to the whitepoint. The calibration window stubbornly insisted that nothing was changing. And yet, visually, my desktop was clearly turning greener and greener, especially in the shadows and midtones. The highlights barely changed, but the darker areas took on a distinct green cast.
That’s when I started thinking: maybe the green channel is clipping.: Maybe the green channel, when measuring white, is simply as bright as it can go – at 50%!
To confirm, as I reduced the green slider, my mid‑toned wallpaper drifted back toward a comfortable neutral – but the measured whitepoint still didn’t budge. Only when I crossed below the 50% mark did the sensor once again finally begin to register tiny, incremental changes. At 49, 48, 47, the measured green component shifted slightly. Moving back upward showed the same behaviour in reverse: 47, 48, 49, 50, 51, each step nudging the measured value upward… and then nothing. Past 51, the readings flatlined again.
Something had clearly maxed out.
The green subpixel – or more accurately, the microscopic LCD filter controlling the green‑filtered light – had evidently reached its physical limit. Above 50%, it simply couldn’t pass any more light. The panel wasn’t responding because it had no headroom left. At 56%, green was already maxed out, shifting midtones “greenward” without the whitepoint realising – because at this stage, its simply measuring white.
The whitepoint appeared normal, but the grey balance (which DisplayCAL doesn’t measure at this stage) was completely wrong. That mismatch was enough to throw the entire calibration off, producing the green cast I was seeing everywhere except in pure whites.
I had assumed the calibration process would detect and compensate for this – but it doesn’t. The whitepoint adjustment stage measures only the whites, not the neutral greys. If the hardware is clipping, the software has no way to know.
So to give DisplayCAL a fighting chance at producing a truly neutral calibration, I first had to ensure that none of the monitor’s colour channels were saturated. That meant bringing green down below 50%. I settled on 40% to guarantee some headroom, then rebalanced red and blue around that (30% and 40%) to regain measured neutrality – making sure neither of those channels was saturating either.
Green was, without question, the limiting channel.
And so, with the hardware reset to realistic levels, I restarted the calibration phase.
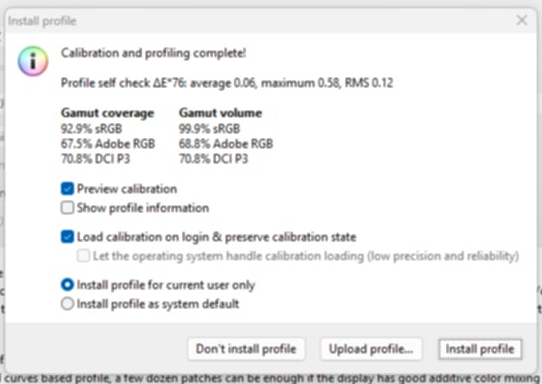
I won’t write much about the actual calibration phase here – the part where ArgyllCMS throws up a hundred or more swatches and DisplayCAL captures them through the spectrometer with an audible chirp – because mostly, that’s just cranking a virtual handle. It takes a while, maybe ten minutes, but afterwards I’m presented with a window stating “Finished” and asking whether I want to install the profile.
I can’t overstate the relief when, clicking “Yes please,” my display snapped into something I had been anticipating all along: perceptually neutral, in all the greys, shadows, and highlights. I finally let out a deep breath, satisfied the job was complete.
Of course, I’m never really satisfied that a completed job can’t be improved, and I figured that my display, while wonderfully colour‑managed, could do with a bit of brightening for regular office and admin work. I didn’t want to live permanently in “calibrated mode,” nor did I want to dive into each monitor’s fiddly little joystick every time I needed a brighter, punchier “office mode.” That sent me down a different rabbit hole entirely: controlling my displays programmatically via DDC/CI, and eventually building an AutoHotKey script that lets me switch modes instantly with a single keystroke.
In the next post, I’ll share the script, the DDC/CI commands, and the presets I built. It’s a surprisingly powerful way to take control of your workspace.